It took longer than I wanted to get to Part 2, but I was waiting on several parts from China.
Note to self: buying cheap stuff from China might be very slow! I knew this, but still sucked.
I was also missing a lot of soldering equipment, which I found out every time I sat down to actually attempt this.
I needed a WiFi component for my Arduino, so I bought a ESP8266 WiFi Shield from SparkFun:
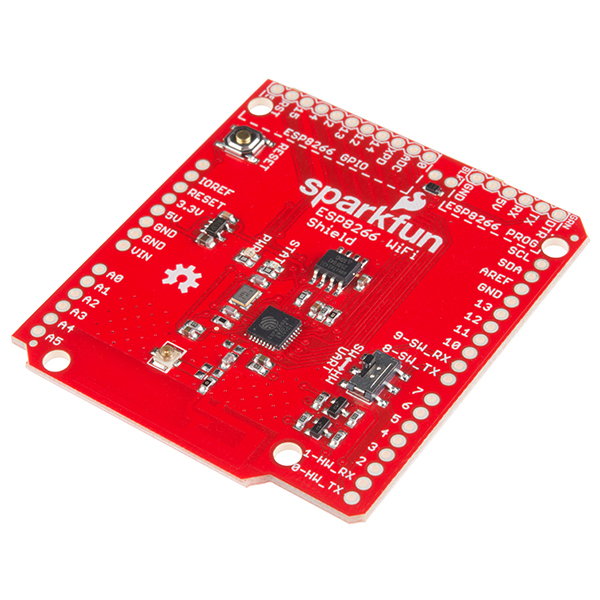
https://www.sparkfun.com/products/13287
https://www.sparkfun.com/products/11417
The only problem with this is that you need to solder on the headers/pins for it. So that is what I did (spoiler alert: and failed at).
The Equipment
Soldering Iron
Well, yeah. Of course.
I bought myself a Dremel 2000-01 Versa Tip Precision Butane Soldering Torch.
I bought this particular one because it was wireless (gas) and it could solder AND do other things like shrink tubes with hot air. Pretty sweet in my opinion. Worked really well too!
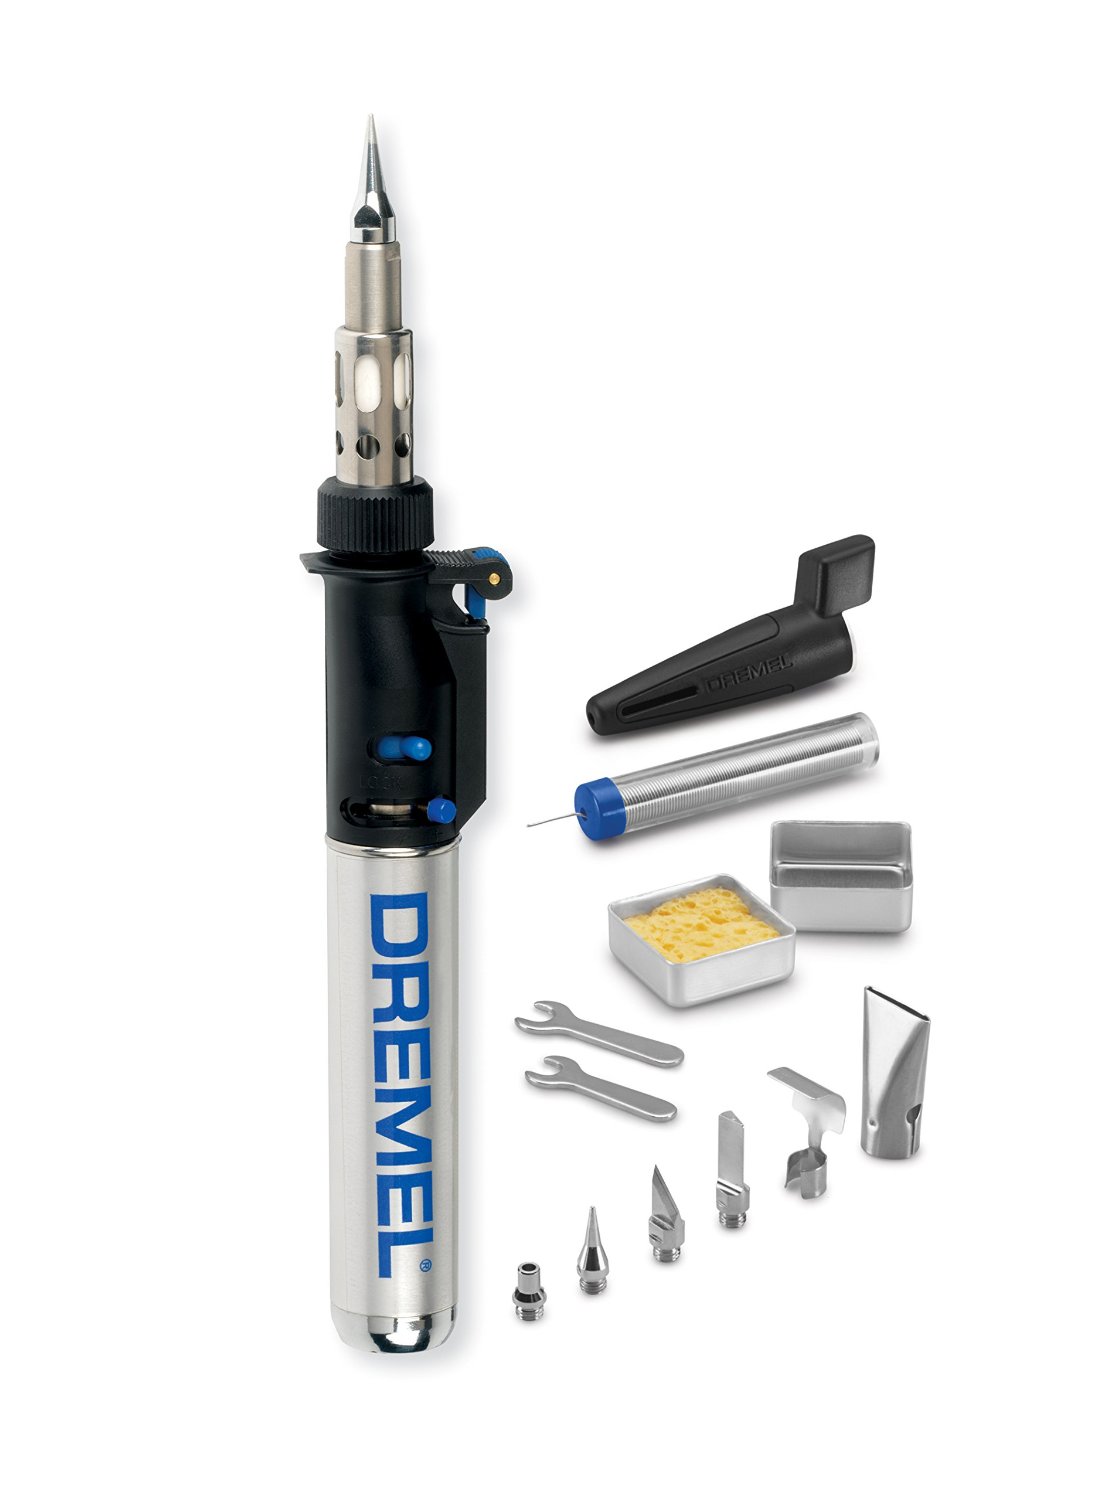
http://www.amazon.com/Dremel-2000-01-Precision-Butane-Soldering/dp/B00MJW08JK
Solder Wire
I have a few spools of solder wire, but for this particular one, I actually just used whatever came with the Dremel.
I am sure there are huge differences between different solder wires, but I am not quite there yet.
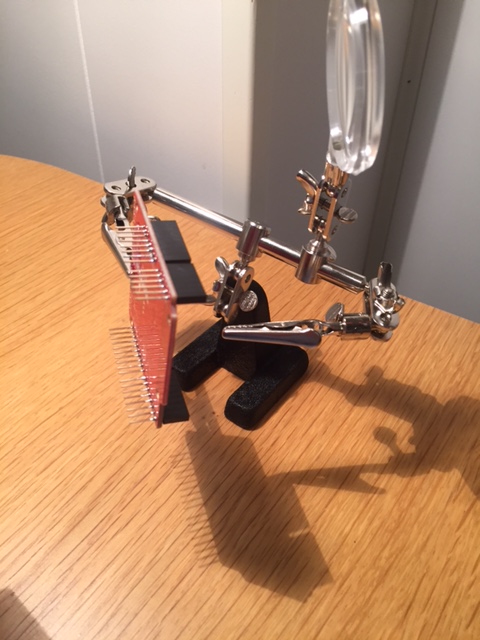
Second Hands
I am not sure if ‘Second Hands’ is the correct name of this, but I know could not have done it without it.
It holds the pins and the board while soldering, and that was completely crucial. Don’t try to do this stuff without it.
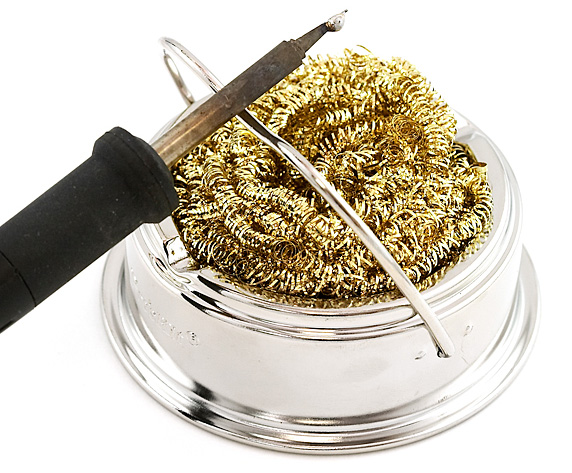
Brass Sponge
For cleaning the tip of the soldering iron, I read that brass sponges were better to use than regular sponges. So that is what I used. It worked really well to wipe off solder… stuff?
The Soldering
I learned the technique from a Youtube video (I mean, why not?).
The result turned out a hundred times better than my previous attempts.
If you have no idea how to do this, you should check out this video:
And this is the result after watching that video.
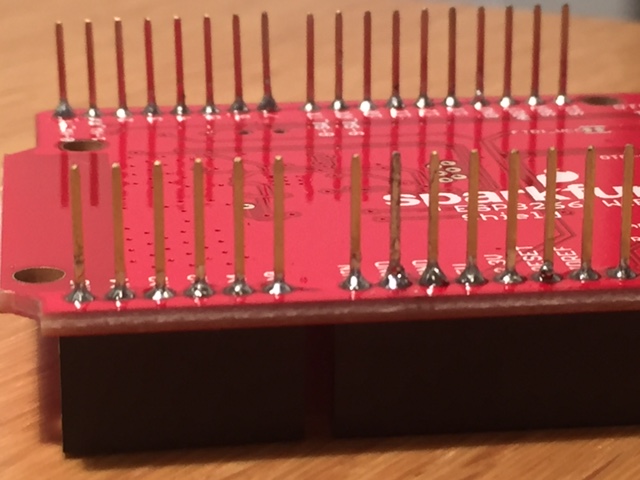
Looks pretty OK, I think. However…
It didn’t work!?!
Turns out, I did something wrong. Or the hardware was broken before I event got it. I can’t upload to the Arduino after inserting the shield. I just get this error message:
avrdude: stk500_recv(): programmer is not responding
avrdude: stk500_getsync() attempt 1 of 10: not in sync: resp=0x00
And this happens no matter what code I try to upload to it while the shield is on.
The internet tells me this can be because of several things, but only one thing seems possible to me: the shield is broken. The reason I believe that is that the Arduino works just fine when I don’t have the shield on it.
I will however, give this another shot. I have already ordered a new one from sparkfun, so I hope I might be even better next time.
I also ordered a few non-shield versions of the ESP8266 so that I can still continue developing, even if I should fail again.
Perhaps I should have practiced on some less important things first? Yes, I should have. I really should have… sigh. Nothing do to about that now.
I think the soldering technique was decent; I just messed up somewhere. It happens.
 Follow me on Twitter: @gjermundbjaanes